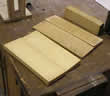
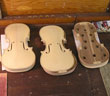
Step 1- Select a Mold
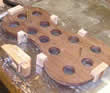 Blocks of wood, typically made out of Spruce, Poplar, or Willow, are placed in violin molds made of Walnut wood. The molds provide a template for making sure the violin meets very specific dimensions (which are often modeled after famous violins). Blocks of wood, typically made out of Spruce, Poplar, or Willow, are placed in violin molds made of Walnut wood. The molds provide a template for making sure the violin meets very specific dimensions (which are often modeled after famous violins).
|
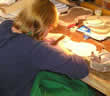
Step 2 - Place C Bouts
 Ribs for the C bouts are then bent into shape using a special iron. Ribs for the C bouts are then bent into shape using a special iron.
|
Step 3 - Attaching C Bouts
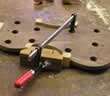 C bouts are then attached with glue to the violin mold and clamped into place C bouts are then attached with glue to the violin mold and clamped into place
|
Step 4 - Ribbing
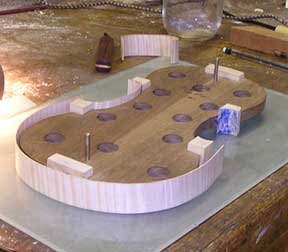 After the C bouts are in place, the rest of the ribbing is attached to the blocks with glue. After the C bouts are in place, the rest of the ribbing is attached to the blocks with glue.
|
Step 5 - Lining
 A thin wooden lining is placed inside the ribbing to reinforce the violin so it will hold its shape when the mold is removed. A thin wooden lining is placed inside the ribbing to reinforce the violin so it will hold its shape when the mold is removed.
|
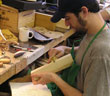
Step 6 - Select the Wood
 Wood is then chosen for the top and back (generally Spruce), and scroll (generally Maple) of the violin. The top and back can be made out of one piece of wood or two pieces glued together. The type of wood chosen for violins is very important to the quality of the instrument. Wood is then chosen for the top and back (generally Spruce), and scroll (generally Maple) of the violin. The top and back can be made out of one piece of wood or two pieces glued together. The type of wood chosen for violins is very important to the quality of the instrument.
Learn more about the wood used for making instruments. |
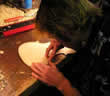
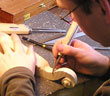
Step 7 - Arching the Wood
 The wood is "arched" or carved into the correct shape. Then a channel is cut along the perimeter of the top of the violin for the purfling to be placed into. The wood is "arched" or carved into the correct shape. Then a channel is cut along the perimeter of the top of the violin for the purfling to be placed into.
|
Step 8 - Adding Purfling
 The purfling is placed into the channel and more arching is done to smooth the shape of the top and bottom of the instrument. The purfling is placed into the channel and more arching is done to smooth the shape of the top and bottom of the instrument.
|
Step 9 - Bass Bar
 A bass bar is then added to the underside of the top of the violin. A bass bar is then added to the underside of the top of the violin.
|
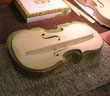
Step 10 - Body Complete
 With the bass bar in place, the top and bottom of the violin are glued together. The body of the violin is now complete. With the bass bar in place, the top and bottom of the violin are glued together. The body of the violin is now complete.
|
Step 11- Sizing the Scroll
 The scroll is then carefully sized. An error as small as a millimeter can completely change the feel and sound of a violin. The scroll is then carefully sized. An error as small as a millimeter can completely change the feel and sound of a violin.
|
Step 12 - Attaching the Scroll
 The scroll is then carved into the desired shape and attached to the violin. The scroll is then carved into the desired shape and attached to the violin.
|
Step 13 - Fingerboard
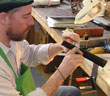 The fingerboard, made of ebony, is carefully shaved into shape The fingerboard, made of ebony, is carefully shaved into shape
|
Step 14 - Gluing
 Once pieces of the violin are finished, the instrument is carefully glued. Clamps are placed along the instrument until the glue dries. After this step the violin is then varnished and is ready to have pegs and strings added! Once pieces of the violin are finished, the instrument is carefully glued. Clamps are placed along the instrument until the glue dries. After this step the violin is then varnished and is ready to have pegs and strings added!
|